Hydramatic Transmission Remove and Install Tips
Rear Wheel Drive Early Hydramatics and Jetaway - Removal
- Purchase a suitable transmission shop manual online. Caution, these units are very heavy and removal is different for each manufacturer, year, model, etc.
Rear Wheel Drive Transmission - Removal -- TH200, TH350, TH400
- CAUTION – BE SURE ENGINE MOUNTS ARE IN GOOD CONDITION AND ARE ABLE TO SUPPORT THE ENGINE WITHOUT THE TRANSMISSION!
- Disconnect battery negative cable
- Remove transmission dipstick
- For 200 series without modulator, disengage throttle cable adjustment lock at throttle linkage
- Place transmission in Neutral (CAUTION: Be sure vehicle cannot roll away, block wheels)
- Remove convertor shield
- Remove convertor-to-flex plate fasteners (rotate engine to access all fasteners)
- Move torque converter rearward with a lever toward transmission about ½ inch (do not force)
- Disconnect shift linkage at transmission shift lever
- For 200 series; remove throttle cable fastener at transmission, lift cable housing to expose connection linkage, disconnect valve body wire link (Z-wire) from cable eyelet; For 400 Series disconnect kickdown electrical connector; For 350 series remove kickdown cable housing fastener and lift housing from transmission case, tip cable housing and disconnect from Z-wire.
- Disconnect modulator vacuum line; remove any line metal vacuum line retainers that will prevent transmission removal
- Disconnect speedometer cable
- Remove drive shaft
- Remove cross member-to-frame fasteners; remove transmission mount fasteners
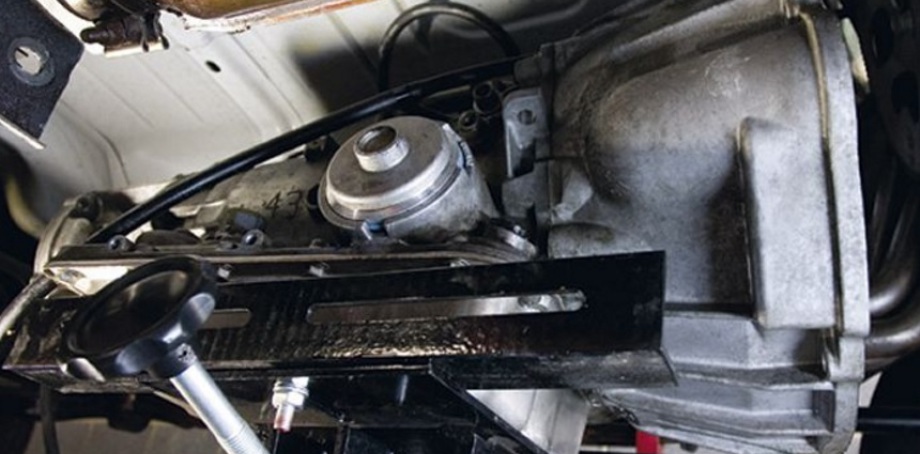
- Lift transmission with suitable transmission jack until cross member clears transmission mount
- Move cross member rearward to clear mount, then position diagonally to clear cross member from frame rails; Remove cross member; lower transmission jack until transmission pan is level with ground
- Remove bell housing-to-block fasteners; be sure all fasteners are removed
- Carefully move transmission rearward by grasping tail shaft and moving transmission side-to-side. If difficult to free from block, be sure ALL bell housing to bolts are removed!!! Get a strong light and LOOK! Using a pry bar or lever, apply pressure between convertor and flex plate to attempt to free transmission from bell housing. DO NOT FORCE ANYTHING. If unit seems stuck, AGAIN, check that ALL bell housing bolts are removed. Move tail shaft up and down while prying back, this may help guide pin dowel disengagement.
- Evaluate flex plate. Check engine flex plate for worn / damaged starter teeth, or cracks near or around crankshaft bolts. Replace if needed.
Rear Wheel Drive Transmission – Installation -- TH200, TH350, TH400
- CAUTION: BE SURE THE TORQUE CONVERTOR REMAINS FULLY ENGAGED TO THE TRANSMISSION PUMP WHILE CONNECTING TRANSMISSION BELL HOUSING TO BLOCK SURFACE! DO NOT TIP TRANSMISSION FORWARD. KEEP CONVERTOR IN THE FULLY REARWARD POSITION INTO TRANSMISSION PUMP.
- CRITICAL: Position transmission near rear of block; check gap between block and transmission is equal, if not equal, position transmission jack adjusters until block-to-bell housing alignment is equal (this means side-to-side; top-to-bottom; and transmission is level with engine)
- Once transmission placement is aligned to block, move transmission forward and BY HAND fully engage transmission bell housing to block surface. DOUBLE CHECK that both side dowel pins re fully engaged. Be sure bell is in full contact with block surface.
- Install, by hand, one left and one right side lower bell housing bolt. DO NOT DRAW THE TRANSMISSION INTO POSITION WITH BOLTS. IF THE TRANSMISSION WILL NOT MATE FLUSH BY HAND, CHECK IF THE CONVERTOR IS CONTACTING THE FLEX PLATE. IF CONTACT IS NOTED, LOWER TRANSMISSION AND PUSH WHILE ROTATING THE CONVERTOR UNTIL IT IS BACK INTO PUMP.
- Install bell housing-to-block fasteners, be sure to capture the dip stick tube attachment tab and any remaining attachment tabs that install with bell housing bolts.
- Raise transmission fully with jack and install cross member (place into frame diagonally, then square member to frame and slide into position.
- Install cross member fasteners, lower transmission onto mount, install transmission mount fasteners.
- Align convertor to flex plate; install fasteners; Install cover shield
- Install drive shaft
- Install shift linkage and modulator vacuum line
- Install new o-ring seal onto kickdown / throttle cable housing
- Connect kickdown / throttle cable eyelet to linkage wire, insert cable housing into transmission, install fastener.
- All under-car work should be complete at this point. Recheck torque on all fasteners.
- From under hood; 200 Series with throttle cable, open throttle fully and snap adjustment clip back into position.
- Connect battery and follow refill instructions
Front Wheel Drive TH425 Transmission - Removal
- CAUTION – BE SURE ENGINE MOUNTS ARE IN GOOD CONDITION AND ARE ABLE TO SUPPORT THE ENGINE WITHOUT THE TRANSMISSION!
- Disconnect battery negative cable
- Remove transmission dipstick
- Place transmission in Neutral (CAUTION: Be sure vehicle cannot roll away, block wheels)
- Remove convertor shield
- Remove convertor-to-flex plate fasteners (rotate engine to access all fasteners)
- Move torque converter rearward with a lever toward transmission about ½ inch (do not force)
- Disconnect shift linkage at transmission shift lever
- Disconnect kick-down electrical connector at transmission
- Disconnect modulator vacuum line; remove any line metal vacuum line retainers that will prevent transmission removal
- Disconnect speedometer cable
- Be sure disconnected items are tied back and out of the way
- Leave differential and drive axle shafts in place – no need to remove these
- Remove upper bell housing-to-block fasteners; only remove those that must be accessed from the top of engine area
- Raise vehicle and support transmission with suitable transmission jack. CAUTION: THM425 IS HEAVY.
- Remove the differential-to-transmission fasteners. NOTE: There is one “special nut” hidden between the differential and oil pan. Use a light to locate this fastener. You will need to bend a thin wall 12 point box end wrench to remove this fastener or purchase a special tool.
- Remove remaining bell housing fasteners from under car.
- Carefully move transmission rearward as far back as possible. It should be touching the bulkhead (firewall).
- Lower transmission slowly being sure that it is not catching on anything.
- Check engine flex plate for worn / damaged starter teeth, or cracks near crankshaft bolts. Replace if needed.
Front Wheel Drive TH425 Transmission – Installation
- CAUTION: BE SURE THE TORQUE CONVERTOR REMAINS FULLY ENGAGED TO THE TRANSMISSION PUMP WHILE CONNECTING TRANSMISSION BELL HOUSING TO BLOCK SURFACE! DO NOT TIP TRANSMISSION FORWARD. KEEP CONVERTOR IN THE FULLY REARWARD POSITION INTO TRANSMISSION PUMP.
- NOTE: IN NEXT STEP, GLUE DIFFERENTIAL GASKET TO DIFFERENTIAL. BE CAREFUL NOT TO CATCH AND TEAR GASKET WHILE POSITIONING TRANSMISSION. IF GASKET IS DAMAGED, START AGAIN WITH NEW GASKET.
- CRITICAL: Slowly raise the transmission into position. Be sure it is not catching anything on the way up. WATCH DIFFERENTIAL STUD. Position transmission near rear of block; check gap between block and transmission is equal, if not equal, position transmission jack adjusters until block-to-bell housing alignment is equal (this means side-to-side; top-to-bottom; and transmission is level with engine). YOU MUST ALSO ALIGN THE DIFFERENTIAL CONTACT POINT AT SAME TIME.
- Once transmission and differential is aligned, move transmission forward and BY HAND fully engage transmission bell housing to block surface. Use a lever behind the transmission between the firewall and transmission rear cover. DOUBLE CHECK that both side dowel pins are fully engaged.
- Install, by hand, left and right side, lower bell housing to block fasteners. DO NOT DRAW THE TRANSMISSION INTO POSITION WITH BOLTS. IF THE TRANSMISSION WILL NOT MATE FLUSH, CHECK AND IF THE CONVERTOR IS CONTACTING THE FLEX PLATE. IF IT IS, LOWER TRANSMISSION AND PUSH / ROTATE CONVERTOR BACK INTO PUMP. START OVER.
- Engage the transmission to the differential. BE SURE NEW GASKET IS NOT DAMAGED!
- Install all differential-to-transmission fasteners and tighten to specification. BE SURE TO INSTALL THE SPECIAL NUT IN THE HIDDEN AREA. BE SURE TO TIGHTEN FULLY OR A LEAK WILL OCCUR!
- Install remaining bell housing-to-block fasteners, be sure to capture the dip stick tube attachment tab and any remaining attachment tabs that install with bell housing bolts.
- Align convertor to flex plate; install fasteners; Install cover shield
- Install shift linkage, kick-down connector and modulator vacuum line; check all routing.
- Recheck torque on all fasteners.
- Connect battery and follow refill instructions